Monday, October 28, 2019

AAR31: Blood in the Sky

The battle of Objective B32 contrasted greatly with the other battles of the day in that it started with the fiercely contested air battle.  Uwanda was able to field two F5E Tiger IIs, and four F5A Freedom Fighters to clear the skies for close air support.  Mugabia defended with four Mig 21s, and a pair of Mig 15s.

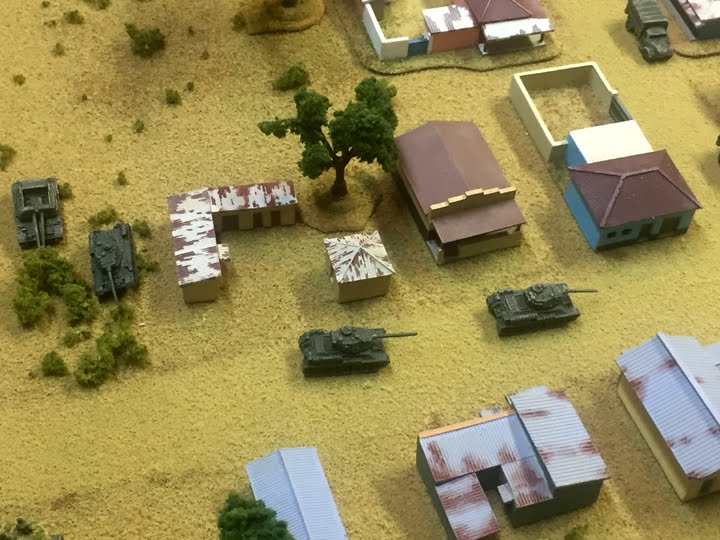
B32 is located in the lower right on the map above.

The F5Es were equipped with a two AIM-9L all-aspect Sidewinders missiles, while the F5As carried a pair of AIM-9B rear aspect only Sidewinders.  The Mig 21s carried a pair of AA-2 Atoll missiles, a close copy of the AIM-9B.  All of the fighters were equipped with their respective guns.

The shooting started with the pair of F5Es leading the way, each launching a missile at Mig21s to the left of the formation rapidly approaching.  One of the missiles found its target, breaking up the Mig very quickly; a parachute was seen descending from the wreck.  The other missile was successfully evaded.

F5Es fire their Sidewinders.

Heart pounding, Jalil saw the missile coming in from ahead.  At the last second, he dove turning sharply first one way, and then the other.  He expected the explosion, but the missile passed behind him, turning sharply, but not sharp enough.  Turning his head, he saw the missile had crossed behind him, now rapidly travelling away from his jet.  "I can't believe it worked! That was not so hard as I thought."  Now to kill the man that tried to kill him.

Missile evaded!


As the aircraft closed, the F5Es fired another pair of missiles at the other two Mig21s at very close range.  Amazingly, both missiles missed their targets and the F5Es suddenly found themselves in gun range of the Migs,


Gunfight!

While the remaining Mig from the first pair turned north, the other pair of Migs closed with the F5s for head on shots.  Almost simultaneously, all four aircraft fired, one of the F5Es disintegrated, with the pilot somehow escaping from the airborne cloud of debris.

FrE being chased by an AA-2.

The surviving F5E turned and dove, while the Migs continued on their path, heading towards the two closest F5As.  The other two F5As turned to engage the single Mig21 to the north.  The single Mig in turn, headed for the surviving F5E.  All the while, the two Mig 15 pilots listened on the radio to the fight taking place, while their aircraft screamed at maximum speed, trying to get their in time to take part.

The pair of Migs exchanged shots with the pair of F5As, all of the aircraft finding themselves caught in a complex furball.  The single Mig suddenly found itself with a shot on one of the F5As, but missed, then received minor damage from another of the F5As.  The F5E, lost by the single Mig,  still trying to climb back into the fight took a hit from one of the pair of Migs, and trailing smoke, lost power.  The pilot would survive the fight, but his jet would not make it home.

The "furball".

The pair of F5As engaging the pair of Migs, momentarily got the advantage, both firing a missile at one of the Migs,  one of which killed the Mig.

Mig 21 in a bad way.

The second Mig21 of the second pair lined up shots twice on an F5A, but missed both shots.  The other F5A also missed a shot on him.  By this time, all of the aircraft found themselves in  a cluster, and both of the F5As that were chasing the Mig from the first pair, got missile shots on the Mig from the second pair.  The first missile turned the Mig into a fireball, the second missile then hit the fireball.

The single remaining Mig from the first pair, found itself in a swarm of F5s, and decided to try to fight his way out of it.  The Mig tried to lined up a shot one of the F5As, while being chased by two more. Unfortunately, before he could line up his next shot, an F5A behind him fired, wounding the Mig pilot, Jalil, and forcing him to try to disengage.

At about this time, the two Mig 15s arrived on the scene, the first pair of F5As spotted the newcomers, and announced their presence.  All four F5As  turned towards the Mig15s.  The two lead F5As closed trying to get the advantage, so that they could fire missiles.    The leading aircraft from each side, fired at the other, the Mig missed, but the F5 did not.  Several round went through the engine of the Mig15, which immediately went into a dive.

The Mig 15s arrive.

The remaining Mig 15 lined up on the other F5A at long range, fired a burst and took minor damage from the F5.  The F5 was riddled with damage losing engine power, flight control and weapons control, and a lot of fuel.   The pilot was later rescued.

An F5A going down.

The Mig 15 continued forward, closing with the next closest F5A, firing a long range burst, and watching the F5A turn away, trailing smoke.

The Mig then found itself in the sites of a third F5A, and got a shot off, just before a couple 20mm rounds came through his cockpit.  The Mig pilot died instantly, but would be remembered as a hero, as the fleeing Mig 21 pilot had seen how the Mig15 had saved him.  The F5A took very minor damage, but his guns were fowled, and out of missiles, he had no weapons.

The last Mig falls from the sky.

The disarmed F5A remained on station to assist his wingman in protecting the forces on the ground. After all, the enemy didn't know his guns were jammed.  During the fighting in the air, the ground battle at B32 had gotten underway.  Hopefully the close air support could now come in and help their cause.

Losses:

Uwanda:
2x F5E
2x F5A

Mugabia:
3x Mig21
2x Mig15

An expensive battle for both sides, resulting in likely delays for ground attack aircraft for both sides.  

I was surprised at how bad the AIM-9Ls did v. the Mig 21s, 1 fo 4 not being a great success rate.  Again, the superior guns of the Migs proved a great threat, allowing notable hits at much longer range, than what the F5's guns could do.  The success of the Mig15s was a bit of a surprise, as lining up the shots is still hard, and the frequency of "pilots hit" and "pilot killed" was disproportionate in this game.

Thursday, October 24, 2019

AAR30: Resuming The Push

After a much longer break than expected, I fielded my first 6mm African imagi-nation battle.  The battle took place at the village at Objective B6 on the map in north-western Mugabia, and featured Uwandan Army forces attacking the defending Mugabians.


Objective B6 is a Mugabian town roughly top center above

Mugabian forces consisted of the following:

1x Motorised infantry company in 11 trucks with 9 squads of troops
1x T34/85 company of 10 tanks
3x 120mm motars w/truck
2x ZPU4 AA gun w/truck
2x 85mm ATG w/truck
2x BRDM2 scout car
2x SU100 tank destroyer

Uwanda's attacking force consisted of two elements:

Task force 7
2x Saracen Command post
8x Centurion III
1x Mech infantry company with 11x Saracens and 10 squads
2x Wombat
3x Saladin

Task Force 8
8x Centurion III
1x infantry company with 13 Saracens and 12 infantry squads
2x Wombat
1x Universal Carrier (Arty HQ element)
4x M7 Priest


The land surrounding Objective B6 is flat and open (good tank country, bad for infantry), with few trees and bushes separating largely unproductive farm fields.

The battlefield generally looking east toward the Mugabian forces.

Mugabians blocking teh road into town.

The Battle

The battle started in the air (well, almost) with Uwanda's Air Force providing 4x F5A Freedom Fighters for top cover.  they quickly chased away a pair of Mig17s, and a single Mig 15 without incident, providing safe passage for a flight of G91 attack aircraft that were never called upon.

The land battle commenced at 0800 with Uwandan Saladins approaching the village and scouts dismounting, trying to make contact with the enemy, a process that took some time and concerned their HQ.

Almost as soon as the scouts found the Mugabians, a Mugabian SU100 found one of the Saladins,  began long range fire, chasing it from view.

Mugabian forces along the western (left) frnges of town(really, they are there).

Being aware of Uwanda's prior experiences with their tanks and Mugabian RPGs, the Uwandan commander decided to advance with his APCs, supported by the Centurions.  He wanted his infantry to thin out the Mugabian rockets, before getting shots at the tanks. 

Following the Uwandan advance. Mortars and M7s are landing rounds.

In time Mugabians sighted and engaged the oncoming Saracens,  first with an 85mm gun, then with the T34s, tracking one Saracen, and destroying another.  Artillery destroyed the tracked vehicle and killed one of the squads.  Centurions returned fire, destroying both the 85mm gun, and three T34/85s. 

At around 800 meters range, the Uwandan infantry deployed into cover, and began exchanging fire with the Mugabian infantry.  The Mugabian BRDM began firing its heavy machinegun, but was quickly dispatched by a Centurion.  

Uwanda's infantry dismounting (roughly center of the photo).

The infantry closed to inside 600 meters, exchanging fire all and the way, but only inflicted very light casualties on the Mugabians at this range.  Given the condition of the Mugabian forces, light casualties were enough to push them pass the breaking point, Mugabian morale failed and troops began to fall back.

Mugabian infantry falling back.

The Mugabian commander tried to employ his reserve, but it was simply too small, had too far to move, and could not save the flank.  Some T34s advanced near the road engaging Centurions, but were outnumbered and out-gunned, and quickly silenced.  As Mubabian infatry were overtaken, a small number of troops surrendered.

T34/85s other side of the road preparing to die.

The reserve wondering about pointlessly.

The Mugabian commander knew the cause was lost and had already ordered a withdrawal.  Objective B6 was now Uwanda territory.  And, unknown to the Mugabain commander, so was the objective to which his forced retreated.

The overall situation near the end.

Losses:

Uwanda:
2x   Saracen
1x   Landrover/Wombat
14x  KIA


Mugabia:
5x   T34/85
5x   trucks
2x   ZPU4
1x   BRDM
2x   85mm gun
15x  KIA
23x  WIA (Pow)
13x  POW

Captured by Uwanda:
1x  T34/85 (tracked)
4x  trucks
1x  GAZ69
1x  85mm gun
1x  ZPU4


Thoughts:

As I set up the game, I realized that this was quite the mis-match, and despite much anticipation, the game was a bit anti-climactic.  The T34/85s are no match for the Centurions, Mugabia didn't have enough infantry to cover the ground that needed covered, and pulling back into a tighter circle around the town would have made then a choice target for air attack.

It is probably well enough that the game was so lop-sided, as I got re-acquainted with 6mm scale, ranges and movement.  It was a little bit of an adjustment for me, and I'm glad that it didn't happen in a closely contested battle, where I might have erred with respect to scale, such that it skewed the outcome of the game.


The next battle at Objective B32, which is already in process,  is a very different creature, full of drama and surprises.

Wednesday, October 16, 2019

A Funny Thing Happened

Yesterday, I got up, went to the basement for another painting session, and was confronted with this:


That empty area in front of all that paint has been filled with  a constant parade of no less than 80 pieces of micro-armor trudging through the painting line since January.  Over 1500 miniatures later... emptiness!

I sat there for a few minutes, sort of lost, wondering what I should work on next.  Then suddenly it hit me; I still had those African buildings to finish.  The same buildings that I've been needing to finish for about a year.  The ones that I just couldn't seem to make any progress on.  The ones that gave way to the 1500 pieces of micro armor all those months ago.  And something else happened.  All of a sudden, I could "see" them.  

By "see" them, I mean, see what they should look like, and want to paint them.  Something that hadn't happened in all the time that I had been trying to get them done.  Yeah, I know, I even had pictures of many of them, but I just couldn't get the mojo going with them.

So, I grabbed the ten remaining buildings that I had prepped to paint (last October/November), and got to it.  A day and a half later, I finished those ten African buildings that had been holding me up for months.  Here they are:


And below are the 11 buildings that I finished in the twelve months prior to the last two days:


Half of them still need some flock added to them; that'l come in a night or two.  But now I can finally get on with my modern African campaign that has been on hold for a year and a half.

Its funny, I struggled so much with getting these done.  They just didn't flow, then all of a sudden... Boom. Done.

I even managed to get 22 stands of 6mm Mugabian infantry finished at the same time, this weekend, I will likely be playing the next battle in my imagi-nation campaign, my first in 6mm.

Now I just need to figure out where i buried my folder with all of the info for the battles...

Monday, September 30, 2019

SFB Campaign: The Big Lyran/Hydran Battle of Strategic Turn 9 - Part 2

Well, we finally finished the "battle of the century" with-in our re-fight of the general war in our SFB Campaign.  If you remember, we had roughly 130 ships meeting in the battle consisting of Lyran, Hydran, and Kzinti fleets. 

Re-capping our first meeting we completed turn 1 with the Kzinti destroying five small Lyran ships of the southern combined fleet, and the Lyrans heavily damaging two Kzinti battle cruisers.

The Photos: The orange markers (mostly to the left), and white markers to the right are mines.  The Lyran ships are yellow markers (bottom center below), the Hydrans are green (top center and to the right), and the Kzinti are white (mixed with Lyran, almost in the center below, and nearly indistinguishable form the Lyrans (sorry)).

Session 2: Near the start, the Lyrans exchange
 ships with the Kzinti near the center of the board.

In our second meeting, turn two action picked up almost immediately with the Kzinti unloading on two more small Lyran ships, vaporizing a frigate and a police corvette, and then pulling a high energy turn to break off with the Lyrans.  The Lyrans responded by taking out four of the battle cruisers at the cost of another 4 small ships.  Turn two ended with both the Kzinti and Lyran fleets separating and regrouping.

During turn three, the Kzinti linked up with Hydran forces, accomplishing one of the game objectives while the Lyran northern fleet merged with the southern fleet, and then advanced to render one more Kzinti BC into dust.  Turn three ended with both fleets maneuvering, and attempting to find an advantage among the nearly endless mine fields that had been laid thus far during the battle.  These two turns took about five hours to play.

Session 3: The Lyrans losing ships as they fight through Hydran 
fighters, the surviving Kzinti have withdrawn behind a small group of 
orange mines center right.

Our third session involved two turns of the Lyrans wading through a large number of Hydran fighters, with heavy losses of escorts and finally losing a larger war cruiser.  Approximately 120 Hydran fighters were killed, but only one Kzinti BC was lost during the two turns.  My Lryans lost eight more police frigates, frigates, and a dd, in addition to the war cruiser mention about.  

This session involved about 4 hours of gaming, with the current losses standing at 20 Lyran ships for the cost of 6 Kzinti battle cruisers.  Not good thus far.

Session 4: The Lyrans working their way through mines
trying to get at the Hydrans.

During the fourth meeting, we played a single turn in about 3.5 hours.  This was a brutal turn with continuous ship combat as the core of the fleets finally moved into range as each advanced through a corridor defined by the two extensive minefields.

At first, the Lyrans continued to take losses of smaller ships, FFs, and DDs mostly, until the Lyran CLs and CWs got into the range, then things began to level out, first with the Kzintis losing two more BCs, and then the first Hyrdan losses finally came, in the form of a couple Dragoons, heavy cruiser classed vessels.  As the Lyran heavy cruisers came into range, their War cruisers began to waver, two being destroyed, and others fleeing with heavy damage.  

But, by this time, the Hydrans had largely expended their weapons, and took damage while trying to maneuver around mines and away from the faster Lyrans.  By the end of the turn an additional 4 Hydran ships had been destroyed, including two more heavy cruisers, and several others had significant damage.

In all seven kzinti and Hydran ships had been destroyed (including 5 CA/CC/BC classes vessels) for the loss of 9 Lyran vessels (2xCW, and 7x DD or smaller classed).

Session 5: Near the start of the last turn. the Lyrans pursue 
the Hydrans, who are beginning their escape.

The fifth and last meeting involved playing only one more turn in about three hours of gaming.

The fleets started the turn with ships only about 5 hexes apart, and with the Hydrans having turned and starting to move away from the Lyrans.  As it turned out, the Hydran Hellbores were devastating to the Lyran ships hit by the weapons, but the two turn arming cycle proved to be a greater burden than anticipated, when combined with negotiating the mines.  This resulted in the Hrdrans accelerating to speed 30 in an effort to escape.

The Lyran fleet expended much energy to maintain a fleet speed of 22, and had to sacrifice energizing some weapons on many of the ships.  Thus, some disruptors and phaser Is, and many of their phaser IIs could not be brought to bare, allowing several lucky Hydrans ships to get away, that otherwise may not have.

The turn started with Lyran ships blazing away, and in the following impulses, destroying two more Dragoons (Heavy cruisers), and a couple of Lancers (DDs?) for no losses.  A number of other Hydran ships received damage, but none could be destroyed as range began to increase as Hydrans raced away.

The Lyrans turned away to begin picking up the many admin shuttles that they had dropped to act as a screen against the remaining  enemy drones and fighters.  As weapons came into arc, they also fired a parting salvo against a damaged Kzinti BC that had been limping away for the last four turns, destroying it in the process.

In the end, the turn yielded 5 enemy losses to no Lyran losses before the Hydrans disengaged.

Total losses for the battle were 29 Lyran ships to 19 Hydran/Kzinti ships and 120 fighters.  The real story is better told by losses per class:

Lyran:                                  Hydran:
Pol 10x                                Cuirassier 2x
FF  11x                                Lancer  4x
DD  3x                                Dragoon 2x
DW  1x                                Lord Marshal 2x
CW  3x                                Kzinti BC 9x

The fighter losses are replaceable, as the Hydrans are withdrawing to the captured Lyran planet and support fleet with FRD, mobile base, and freighters.  The point values of the ships favors to a small Lyan tactical victory, but in the strategic scope of the game, I think this is a Hydran victory.  

The Hydran fleet suffered a small number of losses, with their loss of CAs be replaced by the Kzinti additions.  The Lyrans lost a huge number of small escorts, losing much of  their ability to screen Hyran fighters, and greatly reducing their ability to respond to multiple locations simultaneously (which may not be an issue, given Hydran tactics thus far).  

One side benefit from the battle, is that I have learned how to deal with Hydran fighters and weapons, and the Hydrans seemed to have lost faith in their ability to dominate with fusion beams and Hellbores.

The end:  Weapons expended, the Lyrans pass through the mines 
and turn back to recover shuttles, the Hydrans off in the upper right 
of the map.

This is the largest pure fleet battle that we've ever played.  The battle consisted of roughly 120 fighting ships (a small number of scouts, freighters and Q-ships broke away from the fighting), and 158 fighters.  Of those, 48 ships and 120 fighters were destroyed, during 7 turns played over 18 hours in 5 days. 

Whats Next:  We still have two battles to fight to complete the strategic turn; a Lyran attack on a Kzinti base station (with miniatures), and a Klingon attack on a Kzinti starbase (using counters).  We haven't decided which to play first.

Sunday, September 22, 2019

More Scotia-Grendel 6mm Cold War Models (9-21-19)

Here is another batch of photos of 6mm Cold War models from Scotia-Grendal. 


RM-7  ZIL164 Soviet truck entering service int he early 1950s;
 this is a nicely detailed model that looks better in person, than in the pic.


RM4  BTR152V w/twin 14.5 AA MG Nicely detailed and a pretty clean cast.


RM1  BTR152V Soviet APC, has nice detail, 
though some of the castings were from a mold with some wear.


UM0066  M102 105mm Howitzer, a distinctive and nicely detailed model (the angle of the photo detracts from the model).


UM0053  M109 155mm Self Propelled Howitzer,
a very nicely detailed model, of the original short barreled version of  this vehicle.


BM23  Bedford RL  British truck introduced in the early 1950s.  Though the sculpt has enough detail to readily identify the distinctive shape of this truck, a little more work would have made this a lovely sculpt.  The casting suffers from severe concave sides that result in the rear wheel sticking out beyond the cargo bed in the center of the truck. 

With the exception of the Bedford, this was a pretty good group of models from Scotia.  I'll have another group of photos up in a couple of days.

Friday, September 20, 2019

Heroics & Ros Cold war Models (8-18-19)

Here are some photos of models from my latest order from Heroics & Ros.  Still fiddling fiddling with my camera, and just can't seem to get similar results twice in a row, but I think these are better than the last batch.  Anyway, I've got quite the backlog, so I'm running with these for now.  I got ahead of myself again, so they have been primed grey.

BM-53 Conqueror Heavy Tank, it is a beast, generally it is nicely detail, 
though the hull rear is a little soft.

SM-86 BTR152, Soviet six wheeled APC of the 1950s, 
the angle in the pic is kind of bad, it is a nicely detailed model, cleanly cast.

SM-35  BM-21 Soviet Rocket Launcher, a very nice model.

USM-12  M114 Recce track, nice detail and cleanly cast.

SM-28  GAZ69 with Recoiless Rifle, another nice casting with integral driver.

That's all for tonight, but more coming soon.

Monday, September 2, 2019

Odds and Ends (9-1-19)

 I have a backlog of things to share, but have been too busy between work and painting figs to get the figures and photos done.  

Over the last six weeks, we have gotten together three times, fighting out our big Hydran/Lyran battle for our Star Fleet Battles campaign.  We've played 7 turns in about 11 hours of gaming thus far, and probably have another 3-4 turns to go.  Space has been filled with mines, making the going a bit tedious.  Oh, and it doesn't look good, for the Lyrans at this point.  I'll finish writing it up once we complete the battle.

The currently state of the battle, with orange mines to the left,
white mines to the right (and elsewhere), 
the Lyrans in the foreground (yellow), 
and the Hydrans in the distance (green).

My painting table has a constant flow of roughly 100 6mm Cold war vehicles moving across it.  I got into full swing, completing just over 650 miniatures in August (over a 1000 on the year!!).  I'm down to about 200 to go, plus another 200 on order, and then there is maybe 100 aircraft and a gazillion infantry stands to complete.  I'm almost done.

Bradleys, M110s, and M1s mostly in this batch.

All other projects have gone on hold, even my African buildings have finally been bumped, though I only need to complete maybe 8 more to get on with the Uwanda-Mugabia War.

Work should slow down in September, allowing me to share more new Cold War arrivals and whatnot.