The modular terrain needs to be able to represent everything from large waterways such as the Mekong or Bassac rivers to smaller rivers and rivulettes that are barely passable for PBRs, and also the many canals feeding the rivers with commerce and Viet Cong. Features are to include islands, cutouts for "beaching" sampans, small beaches, streams, foot bridges, and small docks or piers.
The terrain itself will be made from extruded polystyrene foam insulation board, in this case, blue Dow-Corning foam. The one inch thick foam was first cut into tiles measuring 1'x1', 1'x2', and 1'x6" to meet the needs of the design. I cut the foam on a table saw, but it can be cut with a hobby knife and straight-edge as well. The basic panels are set out on my table in the photo below.
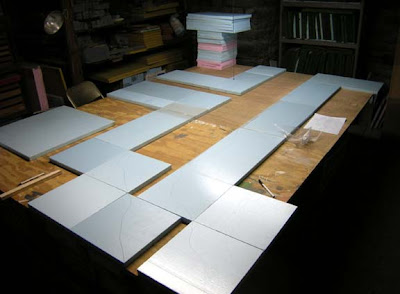
The foam only represents the shore line sections of river and a canal farther away and to the left in the photo. The river and canal width will be variable; the water will be separate sections of styrene plastic (not shown in the photo) that set under the edges of the terrain tiles.
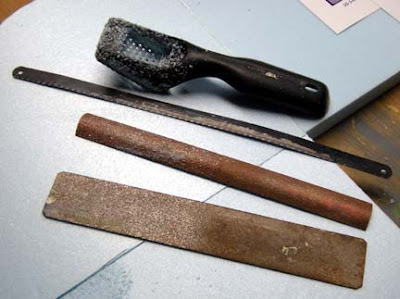 Tools needed to cut and shape the foam include two perma-Grit files, one flat and one curved, a hack-saw blade, and Surform tool. While I have hotwire cutters and other gizmos, I prefer these for most of the work. One last tool that was needed was a profile template for the river bank. This template will be used to trace a standard profile on all of the mating edges of the terrain pieces. I cut this template from a scrap piece of plywood, but usually use tempered hardboard.
After studying a number of photos (flickr is your friend), I settled on a profile as shown in the photo above. The height of the bank to the top of the curve in the template is 7/8". The taper extends back to the center, or 6" point of the template. The bevel and curve each extend about a quarter inch into the template. I started work on the foam by tracing the profile onto all of the appropriate edges of the foam tiles.
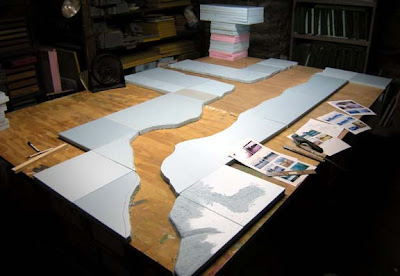 Once the tracing was done, the next step was to draw the actual edges of the bank onto the tops of the tiles, and cut off the excess with the hack-saw blade. Other features such as the beach and cutout for sampans are drawn on as well. With the excess cut away, the general lines of the river can be seen in the photo above.
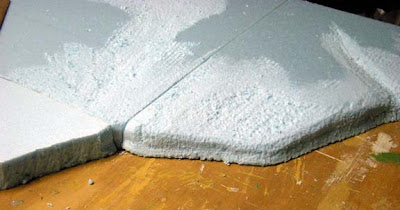 Next comes the shaping. Typically, I started at the traced profile edges and cut the edges with the hack-saw blade. I then used a combination of the curved Perma-Grit file and the surform tool to shape the river bank edge along the length of the tile. This is a tedious and messy step, but not really hard. The surform tool is then used the shape the top of the foam tiles and blend the contours into the river bank edges.
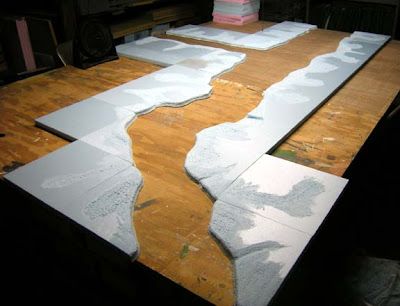
Once the tiles are shaped, the tiles appear as depicted above.
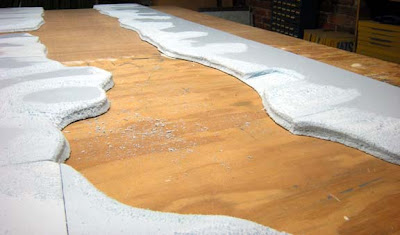
Another view showing the river bank a little better. A sampan cutout can be seen on the far bank toward the right center of the photo.
The work shown above took about three hours. The next part of the process (Part 2) will inolve smoothing and sanding the foam, adding more detailed texture to the river bank and prepping the foam for paint.


Looking real good thus far, I've joined up cause you have a couple of projects that I'm doing or want to eventually do, keep up the good standards.
ReplyDeleteYou continue to amaze!
ReplyDeleteA side note, ever give thought to creating LAVs? I have two of the QRF ones for my Ambush Alley project, but would prefer Irishserb ones to go along with the Humvees.
Thanks guys. Hopefully a new terrain post on Sunday.
ReplyDeleteI want to do the LAVs, but got to get my M2A2 Bradley into a mold first, get the LVT7A1 finished, then there is the GAZ 66, M1078, VAB, ERC-90 ...