NOTE: The discussion below addresses the use of a variety of power and hand tools. Please be aware of, and be sure to follow all safety instructions and practices while using any of these tools. Proper methods, safety guards and equipment, and ventilation should be incorporated at all times to avoid injury.
__________
I cut my foam terrain tiles on a table saw primarily, but over the years have also used a band saw, panel saw, hot wire foam cutter, and a straight edge and hobby knife. I've found the hot wire to be the most tedious, generally being the slowest method, and offering the least consistent edges.
Cutting it with a hobby knife actually works fine once you learn to hold the knife perpendicular to the face of the foam. You can cut or sand a slight inward bevel from top to bottom that will eliminate any problems caused by the angle of the knife going out of perpendicular during cutting. This may be most easily done by making an "L" shaped sanding block with a very slight, maybe 1 degree angle, and sanding the edges of the cut foam.
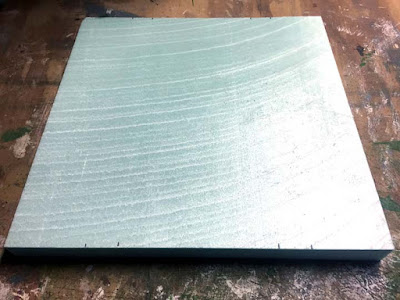
The tiles are cut from 4'x8' sheets of 1 inch thick polystyrene insulation board. These are the greenish foam from Lowes, though I prefer the blue Dow Corning, as I find the green board tends to vary much more in thickness, both across a single sheet and from one batch to the next.
The road edges were located on the end of each tile, then the pavement edges were lightly drawn across the tile with a black Papermate ball point pen. Don't use gell ink, use an old school ball point, and I find that the Papermate ink doesn't bleed as bad as most other brands.
After marking all of the roads on the tiles, I sanded the surface of each removing the gloss or "glazed" finish from the face of the tile, and sand in any features, such as ditches along the pavement edges or depressions in the tile. For deeper depressions, I rasp out a little foam with a Surform tool.
The sanding is done with an ancient Black & Decker/Minicraft hobby sander. Proxxon also used to make a similar sander, and Micro-Mark currently sells this version. Proxxon offers this model, which may work in this application. Be careful not to gouge the foam with the edge of the sanding pad. The older sanders with a rubber sanding foot and with mechanical clamps were actually favorable to newer versions with a plastic foot and velcro type sanding pads. Unfortunately, this appears to be another instance of progress and technology maybe moving in the wrong direction.
Other small orbital sanders, such as the "Mouse" type will work, but are less forgiving and all require a "sense of touch" when working with the foam. Additionally, a combination of orbital sanders and sponge foam sanding blocks will work.
Some hot wire cutters can be configured to cut depressions, but I find these less favorable and more time consuming than Surform and sander. The hotwire creates fumes, and the sanding creates dust, so both come with their own "baggage".
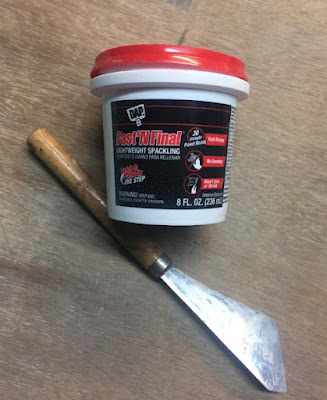
After the sanding is completed, any blemishes, gouges, or defects can be filled with one-step or light weight spackle. I apply it with a small flexible putty knife and by hand, while wearing disposable gloves. It should be applied to as close as a finished state as possible, taking care to create smooth transitions from foam to spackle and back to foam again. The spackle will dry harder the than the foam, so sanding must be done with care so as to avoid creating a "step" at the transition point of foam to spackle.
Instead of sanding, you may be able to smooth and wipe off excess spackle with a smooth damp cloth at the time of application. This is a technique that may require learning some sense of touch, but will eliminate most of the need to sand after drying.I avoid conventional spackle, despite it sanding more favorably with the foam, because artist's acrylic paints and at least some some craft acrylics do not stick well to it. They will form a skin that can easily and accidentally be scraped and peeled off of the spackle with a relatively light touch.
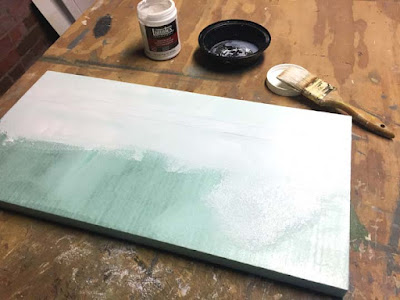
The next step is to apply a coat of acrylic modeling paste to the foam. This will help protect the foam from puncture or gouges, and will add an elastic, rather the brittle skin to the foam. White glue concoctions will also work, generally creating a more rigid surface, but my experience is that in time, the rigid surface receives damage more readily, than the elastic/paste surface, and is rigid skin can be more burdensome to repair.
I've used a mix of brands of acrylic paste over the years; Grumbacher, Liquitex, Royal, Golden, Blick, etc. They all seem to work fine. Some are softer/thinner than others and apply more readily, but offer maybe a little less protection than thicker pastes.
Once the paste is dry, you may notice that the black ink of the roadway edge lines has bled through the paste and is maybe more distinct than it appeared after sanding. I usually give just a light spray of Testor's Dull Coat of other matte spray coat to seal the ink. Otherwise the ink may continue to bleed through the paint and even the flock to some degree. Usually the Papermate ink doesn't do this, but most others will in my experience. The application of the spray need only be over the inked portion of the foam and can be very light, a single quick pass of spray should do. I sprayed all 69 square feet of terrain and didn't finish off a partial can of spray.
Next comes the painting. I use artist's acrylic paints; in this case, a mix of Dick Blick, Royal and Liquitex. I generally use a thinner bottle of economy artist's paint for the primary color and then mix in whatever else I have, as needed for the desired shade. In my case, I use an undercoat of the same basic color as the flock to be applied, so green grassy areas get green paint, blown get brown, etc.
Different methods of painting can be used, particularly in association with how you will finish the tiles with flock. In my case I flock dirt roads, there is no exposed paint, except for the paved roads and waterways, and I usually give those surfaces an extra coat of acrylic paste.
If you plan to leave dirt areas as exposed painted surfaces, you can apply texture to the acrylic paste such a ruts from wheels, or footprints, or you can apply a fine texture material, such a sand or gravel to be painted to a final finish.
While painting, I tend to highlight rises yellower or lighter, and depressions darker, as this helps with the application of the flock in the next step. Otherwise, the shallow rises and depressions in 6mm are not always readily obvious when hurriedly applying the flock. Once the base coat of paint is dry, the road is applied. In 6mm, this is just painted onto the foam, in larger scales I would apply a textured layer, typically a fine sand or ballast. Paved surfaces would typically get an application or two of acrylic paste over the sand/ballast. Or, may be painted or left natural color if representing gravel and or dirt roads.
To mask the edge lines of the roadway, I use an artist's white 3/4" masking tape, which has a favorable tack, that doesn't damage to the acrylic paste and paint. It is available from most artist supply stores in my experience. This is a paper tape, that isn't ideal for masking curved roads, so I simply free-hand those.
The ballast can be added before the initial paste application, or later, resulting in a quite durable road surface. I apply the ballast/sand using artist's matte medium as a glue. For the paved surface, I will apply a layer of white artists tape along the edges of the road, paint on a coat of the matte medium, making sure to apply a solid, even coat, and while it is still wet, apply a generous coat of ballast/sand. Remove the mask after applying ballast, as he matte medium can stick the tape, resulting in flaws if the tape is removed after the ballast is dry.
Let dry (drying time varies considerably with ambient humidity (20 minutes to several hours)), and recover the unused portion of ballast (probably 75-90 percent of the applied volume ). If you find that you have unwanted "potholes" in the road surface, where ballast did not stick, you can apply matte medium to those ares with a fine brush, and reapply ballast over those spots. If you have unwanted lumps of ballast/sand, you can sand those off after the they dry.
Whether I use ballast or not, I tape off the roadway along the edge-lines before painting, then paint the road surfaces accordingly. Roadway markings can be added before or after flocking, though in small scale, I would suggest adding them before the flocking process. They can be added with color pencil, paint pen, or by masking and painting. I typical give the roads a light coat of matte spray after adding road lines.
I'll be adding some city panels later, which will get some roadway markings, but from the photographic evidence that I've found, it looks like many of roads of this type, did not have much in the way of markings in 1950s Germany, so for now, I'm not adding markings to the road surfaces.
The last major step is adding the flock. I use the Woodland Scenics grass and earth blends primarily, and have mixes of lighter and darker shades using about 9 parts other color, and 1 part of the grass or earth blend, depending on whether the base color is green or brown/yellow.
I mask off the road area and apply a solid coat of artist's acrylic matte medium, then highlight lighter, raised areas, with a a lighter green, depressed areas with a darker green, add a little darker brown to the bottoms of ditches, and lighter brown yellow along road edges and whatnot, and then give a solid covering of the grass blend. The process is sort of like painting with flock. I use a large brush 2-4 inch for application of the matte medium, applying a liberal coat, and keep reapplying if it starts to dry out.
On small terrain tiles, the matte medium drying out tends not to be a problem. But if applying to a large area, I start at one end, apply matte medium to maybe a 12 inch wide area across the entire width of the tile, apply flock to the trailing 6 inches of medium. Re-wet the exposed medium and apply medium to the next six inches, and repeat the process until done. You always maintain a wet leading edge of medium across the entire piece, until the application is complete. This avoids medium drying out, and avoid seams/ridges/textures in the application of flock. I also try to maintain an irregular leading edge of wet medium, rather than a uniform straight line, as this helps to minimize any sort of pattern or "striping" effect with the flock.
Again, let dry, with drying time ranging from 20 minutes to a few hours, dependent on humidity. I usually locate a fan in the area, but not blowing directly on the surface of the loose flock, so as to avoid blowing the stuff off of the model and across the room. Once the matte medium has dried, brush off and recover the excess flock. You can touch up any blemishes, applying matte medium with a fine brush and adding flock as needed.
I apply a light spray of matt finish, such as Dull Coat, or Windsor and Newton matte spray to the final product, particularly over the road area to reduce the sheen of the paint. This can be done prior to the application of the flock, if preferred, to avoid getting stray bits of the flock stuck to the road surface.
I would normally apply some weathering to the road before applying the flock, but in this instance I'll probably wait until all of the terrain is finished, and weather it all at once for consistency.
At some point, you've probably noticed that one thing is missing from this terrain; farm fields. I have focused on making a fairly flexible system of roads, waterways, and hills in coming up with this terrain system, but have not found a good way to incorporate farm fields into the tiles. I've played around with a bunch of different ideas, but they either fail to meet my expectations, or add a lot more tiles and work. So I've simply chosen to ignore them.
Fields will be indicated by tree, foliage, and fence lines, and in some cases by separate terrain pieces that set on the basic tiles, though due to material thickness, in 6mm I tend to avoid stacking things that really shouldn't rise much above the grade elevation. I try not to disrupt true line of site any more than I have to.
In most of my games, I use a WYSIWYG sighting system. If figs can't see targets, they generally can't shoot at them. This means, that using a mat with roads, waterways, etc.set on top, and that rise up above the basic elevation of the terrain, block line of sight, particularly at small scale, and disrupt the games that I play. This is one of the reasons for building all of this terrain. This style of terrain also allows for shallow meandering depressions that are often lost in miniature gaming, is more stable than cloth spread over terrain forms, and accommodates more realistic sharp changes in topography, particularly depressions, than other types of terrain systems. The trade-off is that you have a grid on the table, which offends some eyes, and may play into rules that require players to estimate ranges or movement.
Regarding tile sizes, thinner 1/2 inch foam could be used, or thicker, such as 2" foam for that matter (which I sometimes use for specific terrain modules). But, I find that 1 inch best meets my needs. The 12 inch square basic tile is arbitrary, but allows for a fairly rapid set up, while still being relatively adaptable and flexible in copying actual terrain and maps. A friend uses a similar system, but chose to use 11" squares as his base tile, as he gets more tiles out of a sheet of foam. I'm aware of gamers who use other sizes for a variety of reasons relating to games scales, and other needs.
The next "Road to War" terrain post will present stream, river, and slope/hill tiles, as well as a couple other odds & ends. I've already started working on the tiles, and hope to have the post up before the new year.
Hope you have a great holiday season.


